Showing posts with label Machine Production. Show all posts
Thursday, 8 March 2012
Wednesday, 7 March 2012
Machine Production Techniques - Lesson Nineteen
At the beginning of this week I decided to fit the veneered base, and glue the drawer together.
![]() |
| Above: Drawer clamped |
I also cut a handle out using the laser cutter, and then used the bobbin sander to remove the burn marks. I used the remains of the piece to help use as a way to clamp the handle whilst gluing to stop it from bending with the pressure.
| Above: Handle clamped and gluing |
| Above: Finished handle |
![]() |
| Above: Router piece to make profile on table top |
| Above: Finished profile on edge |
| Above: Shaped drawer back |
| Above: Drawer stop |
Finally I fixed the tabletop to the frame. This was done by simply screwing it through the kicker rails, with two screws being fixed and two screws being in a slot to allow for movement in the tabletop.
| Above: The tabletop fixings |
Thursday, 1 March 2012
Machine Production Techniques - Lesson Eighteen
Most of this lesson was spent remaking the back of the drawer as I cut the original too small. I also sanded the table top down using the wide belt sander and then cut it to length.
| Above: Table top ready for profile |
Wednesday, 29 February 2012
Machine Production Techniques - Lesson Seventeen
At the beginning of this week I decided to go in a clamp up the two sides together ready for today's lesson. I also had to re-glue one of the stretchers as it hadn't glued correctly.
![]() |
| Above: Table glued together |
![]() |
| Above: Table un-clamped |
| Above: Table top glueing up |
| Above: Table with drawer |
| Part assembled drawer |
| Above: Drawer joint being test fitted |
Finally just before I left I un-clamped the tabletop, and below is a picture. All I need to do now is sand it down and the use the overhead router to put my inlay in the top and drawer front.
| Above: Table top unclamped |
Thursday, 23 February 2012
Machine Production Techniques - Lesson sixteen
This lesson was mostly spent making the drawer runners, and then gluing two sides of the table together. TO begin with I marked out where the runners will be mortised on the top and bottom drawer rail.
![]() |
| Above: Mortise marked out on bottom rail |
![]() |
| Above: one set of drawer runners |
![]() |
| Above: Sides gluing |
Wednesday, 22 February 2012
Machine Production Techniques - Lesson fifteen
This lesson was the first one back, and I'm glad to say that the leg hasn't twisted any further, and I think the pressure of the framework has actually made it slightly better. After getting it apart (which took much longer and A LOT more effort then expected), I spent most of the time tiding up all the joints to make them fit perfectly. After I did this I remade the middle stretcher, to the correct dimensions this time, and it fitted perfectly. The last thing that I started working on was the Drawer top and bottom Rail, which is what the drawer sits between and guides the drawer in and out.
Below is a picture of the framework fitted together fully:
![]() |
| Above: Table framework assembled |
Thursday, 9 February 2012
Machine Production Techniques - Lesson Fourteen
This is the last lesson before the reading week break, so I just wanted to focus getting everything prepared for the next steps when I get back. Below is a list of things that I need to focus on / correct:
- The first thing that I noticed which I will have to correct is that the middle stretcher is to short, as I forgot that there would be a 4mm gap either side, and so will have to correct this next week.
- One leg has twisted quite badly, and therefore has made the table un-square. I have left the table assembled to hopefully stop it from twisting any further.
The main thing in today's lesson was cutting al the tenons (and forks if required), ready for some miner fine tuning, although they all go in enough to hold together. I also cut the tenon's at 45 degrees so they don't stop each other from slotting into place. However due to my profiles I had to make some holding blocks due to it not sitting flush against the dimension saws sliding fence.
Below are the photos of each stage of rough assembly:
![]() |
| Above: Testing that each legs fits correctly |
![]() |
| Above: Testing middle stretcher mortises |
![]() |
| Above: Testing four legs together |
![]() |
| Above:Testing rails and found middle stretcher doesn't fit (So removed) |
![]() |
| Above: Near complete assembly (Missing middle stretcher) |
Wednesday, 8 February 2012
Machine Production Techniques - Lesson Thirteen
The last week before a well deserved break, so I am trying to do as much as possible. The focus of today's lesson was to make the jigs for all my stretchers and rails, and then shape them on the overhead router. To make the jigs I first used designs from my CAD drawings, and then used the laser cutter to cut them out of MDF.
Once I'd cut the jigs out with the laser cutter, I fitted pieces of scrap wood to act as stop, to give a physical stopping location, so it wouldn't move whilst on the overhead router. I then took each piece in turn and screwed them to each jig, MAKING SURE ALL SCREWS WERE COUNTERSUNK!, otherwise it would scratch the bed of the machine.
![]() |
| Above: Designs for Laser cutter (Blue = cut, Yellow = Engrave) |
To use the overhead router you simply raise and lower a router bit, taking about 1-2mm off each time. To use it with the jig you put a pin into the bed of the machine, and then the jig will follow this and shape your wood. The only thing that is crucial is that the pin is the same size as the router bit, otherwise it will either take too much off, or not enough.
The only problem I had in today's lesson was that the router bits were not long enough to cut all the way through one piece, so I took as much material off as possible, and then removed the remaining material with the bobbin sander.
Lastly after shaping the middle stretcher I cut the mortise and tenon for it to fit into the other stretchers between the legs.
![]() |
| Above: Guide pin for overhead router |
![]() |
| Above: Overhead router and jig |
![]() |
| Bobbin Sander and piece attached to jig |
Thursday, 2 February 2012
Machine Production Techniques - Lesson Twelve
The beginning of this lesson was started by seeing how the table will be finally glued and assembled.
This lesson went really smoothly, and I progressed much further in this lesson then I thought I would, and even learnt how to use two new machines :)
- Test dry run first
- Glue sides first (Rails & Stretchers)
- Assemble whole of frame after sides dry
After this I began to shape the table legs using the spindle moulder and a pre-made jig. To shape the legs I first used the template, to draw a pencil line which was the same as the curve. After this, using the band saw, I removed all the material apart from 3mm up to that line. This meant I would have to make fewer passes on the spindle moulder. After this material was removed, I then had to screw the each leg to the jig, and then clamp the wood down. This meant there was no possible way for the wood to move. After passing each piece in front of the cutter at different angles (starting shallow until you are in line with the cutter), it was ready to be taken out of the jig, and the whole process repeated on the other side.
After shaping the legs I then used the surface planer to make a face and edge on the stretchers and rails ready for tenoning.
![]() |
| Above: Spindle moulder and jig |
![]() |
| Above: Surace planer |
I then asked to be shown how to use the tenoning machine. It is a quite simple machine to use, it has two cutters, one above and one below the piece of wood, and you just set the height with a handle. It also has a hydraulic clamp to hold your work in place. I will upload photos of this shortly.(UPDATED: Images of height adjustment and machine now upload.)
![]() |
| Above: Height adjustment handles and counters |
![]() |
| Above: Image of whole machine |
Wednesday, 1 February 2012
Machine Production Techniques - Lesson Eleven
Today's lesson was spent mostly cutting the pieces into each separate component, ready to be thicknessed to the right dimensions. This took about half the lesson, and the rest I spent mortising using the... you guessed it, mortiser. I don't have a photo of this yet, but will upload load one soon. (UPDATED: Found one image of the finished mortise. Also know include image of mortiser.)
This lesson was easy once I understood how to mark the legs out. I also worked with another person whilst using the mortiser, as it was much easier and sped the process up. Although there is not a lot to write about, mortising took a long time, and WAS HARD WORK !
![]() |
| Above: Mortiser |
![]() |
| Above: Mortise finished |
This lesson was easy once I understood how to mark the legs out. I also worked with another person whilst using the mortiser, as it was much easier and sped the process up. Although there is not a lot to write about, mortising took a long time, and WAS HARD WORK !
Thursday, 26 January 2012
Machine Production Techniques - Lesson Ten
Today's lesson was mainly used to sort, mark out and cut the timber which came in this morning to sawn lengths. This was then stickered and stacked to allow it to dry. I also began on the legs, and the first thing I did was to create a face and edge. After this I then thicknessed each leg to the correct dimensions.
I then spent the rest of the lesson marking out the mortises ready to cut out. We then show how to use the mortiser. This is a machine which has a drill piece inside a square cutter. When you pull down on the arm it first drills a hole, and then the cutter slices the wood to leave a square.
The Mortiser also has a bed which can be adjusted from left to right and front to back by two wheels, allowing you to make multiple mortises or long ones without have to un-clamp your work every time.
![]() |
| Above: Thicknessing the legs to correct dimensions |
![]() |
| Above: Mortiser bits. |
The Mortiser also has a bed which can be adjusted from left to right and front to back by two wheels, allowing you to make multiple mortises or long ones without have to un-clamp your work every time.
Wednesday, 25 January 2012
Machine Production Techniques - Lesson Nine
This lesson was the start of the table with drawer which we will be making. The lesson was a theory lesson, which explained about the mortise and tenon joints we will be making.
A brief description on a mortise and tenon joint:
- Means of mechanically joining two pieces of wood
- Strong - Only moves in one direction
- CUT MORTISE FIRST!!! - Drill bits at certain widths - difficult to fine tune the width of mortises
- Tenon cut after - easy to fine tune to mortise
Why add shoulders:
![]() |
| Above: Tenon with shoulders |
- Prevents racking
- Positive stop location for a tenoned component
- Hides the edges of the mortise
The rule of thirds
Normally for the tenon part of the joint, you divide it by three, and that will determine roughly how big the tenon will be. This may have to be adjusted slightly depending on the cutter.
Our Rails:
We are doing the tenons for the table with this specification:
Finally in this lesson we looked at the spindle moulder. This is a machine which is used to shape pieces of wood by using a jig. This is what I am going to be using to shape the legs of the table.
A few important rules are that it is a maximum cut of 1.1mm, and to shape the legs you have to have one mortise up and one facing you for the first cut, and then one facing you and one facing down to cut the profile on the outside edges of the leg.
Normally for the tenon part of the joint, you divide it by three, and that will determine roughly how big the tenon will be. This may have to be adjusted slightly depending on the cutter.
![]() |
| Above: Rule of thirds |
We are doing the tenons for the table with this specification:
- Split into 4mm, 10mm, 4mm
- Reveal - 3mm
- 37mm maximum length of tenon (Mitred at end - 45 degrees)
- Top shoulder and haunch 10mm
- 150 MAXIMUM tenon length till it becomes forked.
![]() |
| Above: Forked tenon used in leg construction with haunch |
![]() |
| Above: Example spindle moulder |
Thursday, 19 January 2012
Machine Production Techniques - Lesson Eight
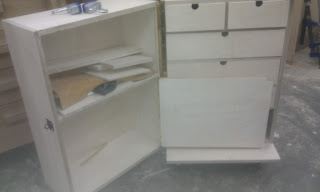
I spent the beginning of the day fitting the drawers and making a wooden base. Fitting the drawers was simple but time consuming, and the drawer base is used as the drawer stop. The base was made out of a piece of wood which was the same size as the base, and then cut with 2/3rds on one side, and one 3rd on the other. This meant that there is a base for one side to sit on whilst shut, and an equal base to fix wheels into place.
![]() |
| Above: Drawers fitted and base installed. |
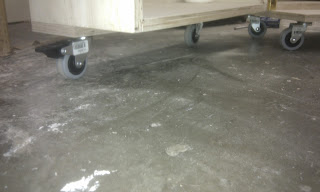
I then decided to go buy some extras for the toolbox during lunch. This included wheels, a hasp, a lock and also another hinge. When I got back, the first thing was to fit the wheel. There are six wheels in total, four for the big base, and two for the small base. Two of these wheels are lockable, so you can stop it from moving.
![]() |
| Above: Wheels fixed to the base of the toolbox |
![]() |
| Above: Hasp and Lock |
![]() |
| Above: Inside door hinged. |
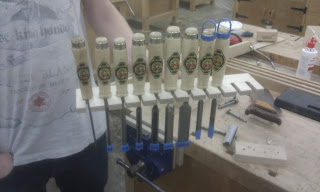
![]() |
| Above: Chisel holder with chisels. |
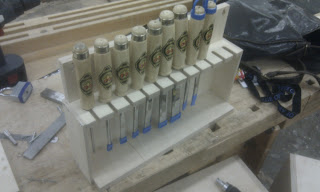
![]() |
| Above: Free standing chisel holder |
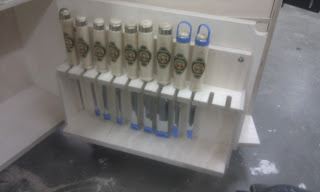
![]() |
| Above: Chisel rack fitted to door |
![]() |
| Above: Saw holders. |
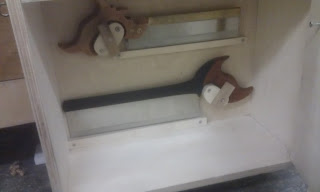
Subscribe to:
Posts (Atom)