Monday 28 May 2012

Design and Prototype - Deadline

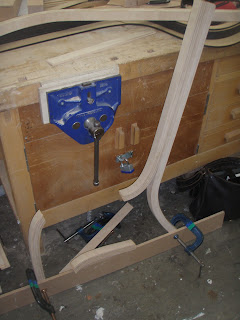
Today was the deadline, and I had a lot of work to do. I began by cutting the top and bottom piece down to the correct size, and then sanding them down. Once this was complete I then glued up the other side of the chair, ready for me to make the feet flat.

Above: Chair side gluing
Whilst this was being glued, I decided to sort out the tops of the chair frame, and round them off:

Above: Top rounded
Finally using the flat bed of a machine and the disc sander I flattened off the feet so it was level, and roughly sanded the rest of the chair. After speaking with both Matt and Richard, it was decided it would be best to leave a finish off rather then rush it and mess it up. However I did submit a sample piece with what the finish would be if I had enough time to apply it. Below is the finished chair:


Overall this has been a massive learning experience, with lots of mistakes but a lot more knowledge gained which I can take with me and also share with others.

Saturday 26 May 2012

Design and Prototype - Lesson Eight

I was beginning to panic at the beginning of this week, as I wasn't sure how I would ever get the chair finished in time. The first thing for me was to clean up the frame ready to start making the mortices for the slates.

I first used a sander which you manually apply pressure to the belt to clean up one side of each piece of chair frame:

Above: Cleaning one side up
After this I cleaned the other side using the wide belt sander to make sure everything was square. This then meant I could cut the mortice and tenon joints for the slats. To cut the tenons I used the tenoning machine, and the rounded of the edges. This is because to create the mortices I used a jig and a router. The jig was made to allow me to make accurate and exactly the same sized holes all along the frame of my chair:

Above: Jig to make holes

Above: Rounded mortice hole

Above: Frame with mortice holes cut
I was excited at this point, as it meant I could dry assemble the slates and frame to have a "seat shaped" object, as I liked to call it:

Above: Dry assembled frame and slates
 And what was even more amazing was that it it could take my weight easily, which I really never thought would happen.
Above: Me and my chair ;)
I then decided, for added stability now that I knew it was going to take my weight, I decided to make some stretchers from left over plywood. These were easy to make, and used a mortice and tenon joint on one end (with the same jig from before) and a dowel joint at the other:
Above: Using the same jig to create the mortices
Above: Opening leg to place stretcher
Above: Stretcher gluing in place
Once dry, I used the wide belt sander just to smooth the edges again. I then glued up one side, ready to start weaving and gluing the pieces into place:

Above: One side gluing in place
Once this was glued and dried, I could then begin to assemble the chair, this took along time, and I even went in today to carry on, as each strip had to be individually glued:

Above: Woven and straight pieces being glued into place
I was dieing to see what it looked like, so at the end of today I roughly cut all the strips down by hand, dry fitted the other side, and below is the result:

Above: Chair nearly finished 
This just leaves Monday (the deadline to finish everything of, and to submit. I should get this done, but probably without a finish applied.

Sunday 20 May 2012

Design and Prototype - Lesson Seven

This week was the first time that I finally got something that looked like a chair. I started on Monday still without my materials, and worried about time I made a jig which would allow me to make the woven pieces, which could then just be slid on from one side of the chair.

This jig was quite easy to make, I first made a base which was roughly the same shape as the side profile of the chair, and then mounted blocks onto this which would hold the slates in place:

Above: Blocks holding the slates in place
 This jig also allowed me to find the best distance between each slate with very little breakages, as show below:
Above: Plywood bent into shape

Above: Complete jig with woven strip in place.
I left earlier then  normally do on this day as it was my birthday on Monday :)

The rest of the week I spent mainly making all the components, as my material came in on Tuesday. However after clamping up the first couple of pieces I realized I was going to have to adjust my jigs, as each one needed 22 clamps. I started  converting them to block and wedges, and it meant that each jig now only needed between 3 and 5 clamps:

 
Above: Jig only needing five clamps
I also glued up both sides of the frame, first making one side, and then using this to try and make both legs the same size and shape:


Above: First frame gluing

Above: first frame glued up and holding second frame in place.


Saturday 12 May 2012

Design and Prototype - Lesson Six


This has been a slow week, with my materials still not arriving when they should have (Thursday). At the beginning of the week, I decided to make some test pieces to make sure that the materials I had ordered would indeed be strong enough, and also do what I required.

The first test piece I made was to find out if the joinery would be strong enough to support the weight and wouldn't split in half. This proved a success so I moved on to the next test:


Above: Test piece on joinery


The next thing that I wasn't sure would work was the woven pieces, as this required the plywood to be bend at very sharp angles in different directions around the slats. To test if this would work I clamped pieces the same thickness to one of the frame jigs, and then tried to weave one strip and then two strips of plywood around them. To begin with this wasn't successful, with the pieces just continuously snapping at every weave. I then spaced the fake slats further apart, and this solved the problem on all of the weaves apart from were the seat frame was angled. After some further thinking and research I tested wetting the pieces first and then weaving them. This was a SUCCESS !!! Once I had worked this out I was in great confidence that my design may actually work, (although will need a lot of clamps):

Above: Testing the woven strips
 Next I worked on the cross pieces that would form the frame of the chair.These were made with four layers of plywood glued together. This meant that they would match the rest of the chair. To speed up making them I used PVA glue, and clamped up four at a time.

Above: Slates gluing up

Finally I cleaned and squared them using the disc sander:

Slates cleaned and square
I also decided to make a couple of other jigs. One of these was another jig for making the framework of the chair, due to the drying time of cascamite (24 hours). I used the same technique as the first jig, but to make sure they were the same I screwed them together and reshaped them on the disc sander.

Above: Jigs screwed together

  Finally I made the jig for the new "U" shaped piece of the chair. This was made by using a leg and one frame as a template to draw round on a piece of mdf.
Above: Pencil line of the shape of the jig
Once I had done this I then found scrap pieces of wood to build it up to the required height and then glued these together.
Above: Scrape pieces gluing together
 I then used the band saw to quickly remove most of the waste of each piece.
Above: Waste removed using band saw
 Finally I used a combination of disc and bobbin sander to remove the rest of the waste and smooth the joints. I finally fixed a base to the jig like the rest of the others.

Above: Jig ready just need a base

Above: Jig finished and shown with the shape of the leg

Sunday 6 May 2012

Design and Prototype - Lesson Five

This week has been about making my jigs on the laser cutter, and also has been a massive set back. I began by using 6mm MDF which I laser cut my jigs onto, and then layered them up in two halves and glued together:
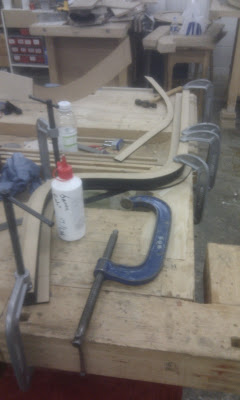
Part of jig glued together
Once they were glued together I used the disk and bobbin sander to smooth them down:
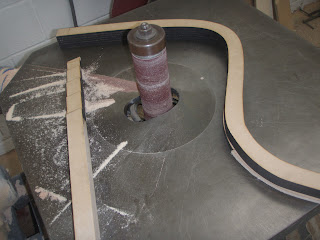
Sanding on the bobbin sander


However after I did this it meant that it had some flat spots which I couldn't remove, which I decided to solve by using some of my spare bendy ply and gluing it to the jig. This was really effective and removed all the flat spots.
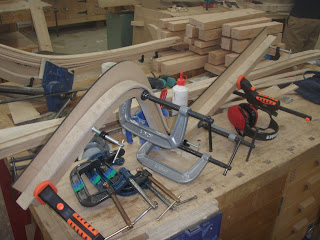
Bendy Ply gluing to jig
 I then was ready to start gluing my framework together, so I glued 6 strips together using PVA glue for both the leg and frame, and clamped them to the jig.
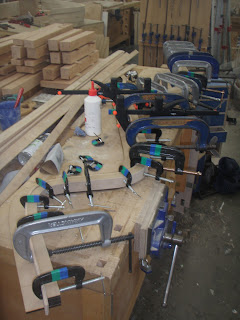
Frame strips gluing together
However once the frame and leg were glued together it was clear that they were not going to be strong enough, and would snap under very little weight, so I decided to try some glue that another student was using, called Titebond:

Stronger Glue
 I was hopeful that this would solve the structural issues that I faced, as it was a much stronger glue. Initially I believed it had solved the problem, but after some testing it failed, with a clean snap through the grain, meaning that it wasn't the glue hat wasn't strong enough but the material itself.
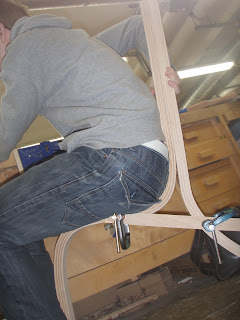
Initial test with strengthening piece

Failed testing
This then meant I started to panic, as the only way I could see being able to solve this issue was to make it out of construction veneers, a slower and much more expensive way. However after much discussion I decided to see if 4mm normal plywood would bend o my jig without snapping. I was rather dubious at first, but soon I had fixed it around the jig with less problems then the bendy plywood.  
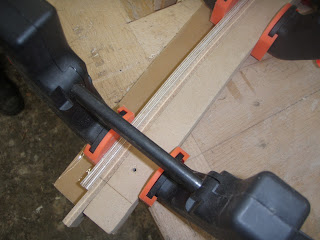
Two strips of 4mm Plywood bent around jig
This meant that all my dimensions have been changed and my design altered slightly to make the whole chair stronger. I first remodeled the chair in 3D, as shown below, which includes a new "U" shaped piece:
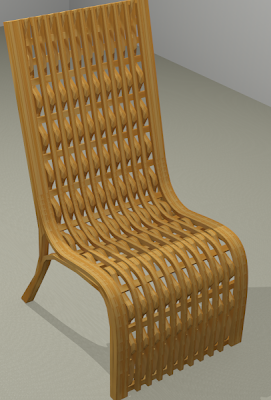
Chair Remodeled
This means that next week I will be making the legs and the slats, as the 4mm plywood board that I require has to be ordered due to the grain direction on the boards. This means I have been set back quite a lot, but I will just have to do other things such as making the jig for the new piece which has been added to the bottom of the chair.