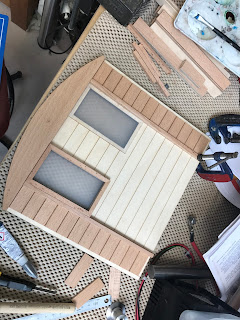
The bodywork began by using the dimensions from the 'Going Electric' article (below), but updating them for my design.
Going Electric Article
I used this information to design a CAD drawing, which i could use to produce plywood templates on the laser cutter, including the final design for the control board
My next step was to produce the beach blanks that would clad the entire body. I began by ripping some strips of scrap Beech on the table saw down to 5mm
Another shot of the strip ripped down with the plywood jig behind
This then needed to be thicknessed down to the correct dimension of 3mm and to remove any saw marks. To do this each strip was stuck on to a crap piece of plywood with our CNC double sided tape. They could then be fed through until the exact thickness was achieved.
The strips were then passed back through the table saw to produce planks of the correct width
Showing some strips all cut to the same thickness and width
The last step was to pass them under the overhead router. This was done to produce a slight bevel along the two long edges, which creates a more realistic plank effect when they are stuck side by side. A similar process was done to produce the square framing section.
A snapshot of testing the laser cut plywood body panels
Testing the correct thickness of the planks against the body
Beginning to glue on the planks which have been cut and sanded to size
The finished front end of the Tram with the light fitted
The new control unit being glued up
The nearly finished control panel (just missing the horn button)
Picture with side panel half glued up.
Nearly there - one more side to go!


No comments:
Post a Comment
If you would like to leave any feedback about this post or blog, please fill out this section.